
This will be a short post detailing the use of Byword and Workflow for offline writing and posting to WordPress. In my previous post, see references, I detailed the reasoning for choosing this combination if you are interested. Obviously to follow along in this step-by-step description you will need to download the WordPress, Byword and Workflow apps listed in the references. In addition you will obviously need login credentials for your blog. This whole project was started because my favorite blogging program, Blogsy, went out of business last year. Since then I have tried many, many approaches to replace the convenience of Blogsy, mostly without success, until I found this combination of Byword and Workflow.
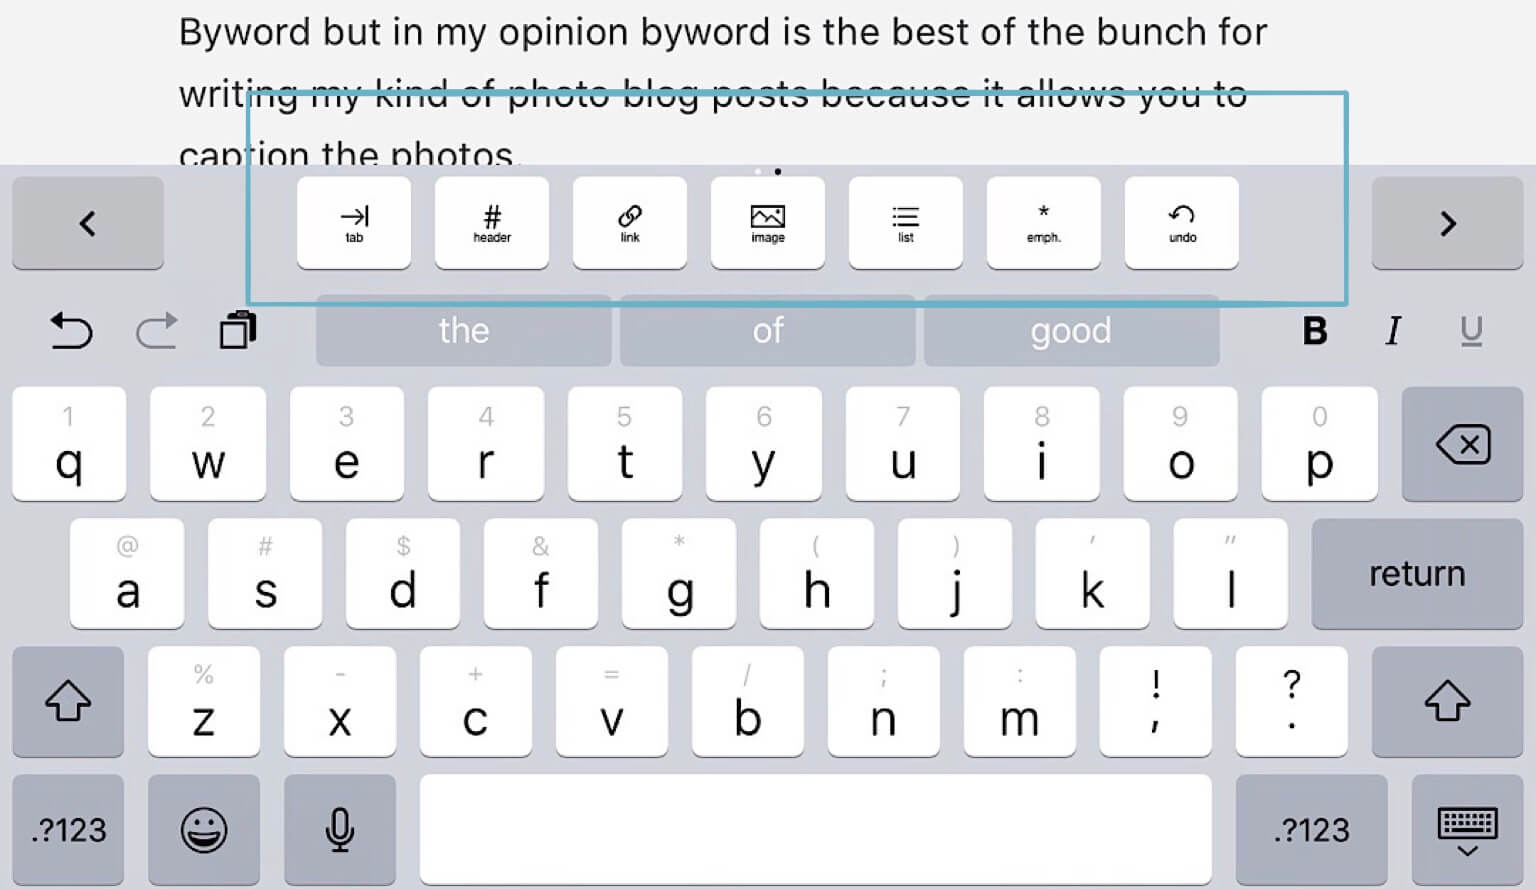
Markdown editors, Byword is one of these, have an intentionally spare interface with menu items hidden to avoid writing distractions. In Byword the menu is hidden in a panel above the keyboard, revealed by swiping left, as seen in the above figure. Here you will find commands to insert images and links along with formatting commands like headers (# ## ### etc). I personally find the spare interface really pleasant to write posts compared to the more cluttered interface of dedicated blogging apps.
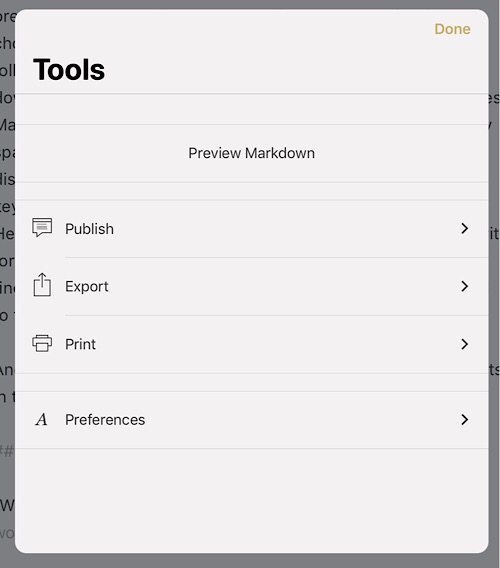
Another set of commands are hidden behind the three small dots in the upper right hand screen when the menu is hidden. On this flyout panel, you will find the mostly standard Preview Markdown command. I particularly like the preview in Byword, it is in color and images are sized proportionally to the text. It is also where you will find the Publish and Export command panels, both of which we will use.
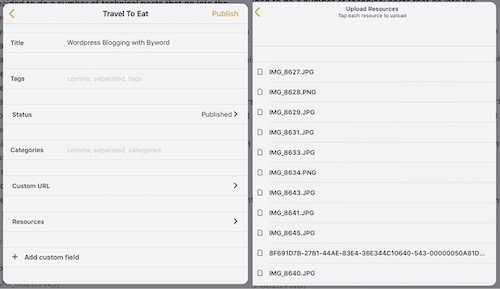
Once you finish writing your post go to the Publish command to bring up the Publish panel, seen above. Assuming that you have entered your site credentials into Byword, you can proceed to add categories and tags. At the bottom of the Publish panel is a command for Resources, which will take you to the Resources panel also shown above. The images used in the post are listed in this panel. To upload them, click on each one sequentially until they all disappear. Then return to the Publish pane and publish the post by clicking on the upper right hand corner Publish command.
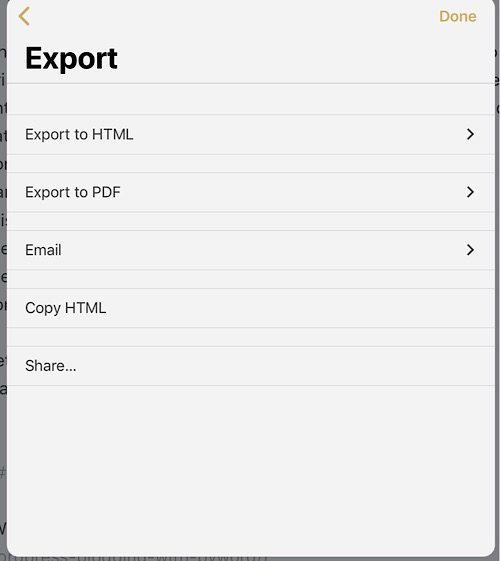
Return to the previous pane, the one with the “Preview Markdown” and go down to Export. In the Export pane you will find Copy HTML, clicking on this will copy the post to the clipboard in HTML using the figure/figcaption format for the images, which are now linked to their positions in the online blog.
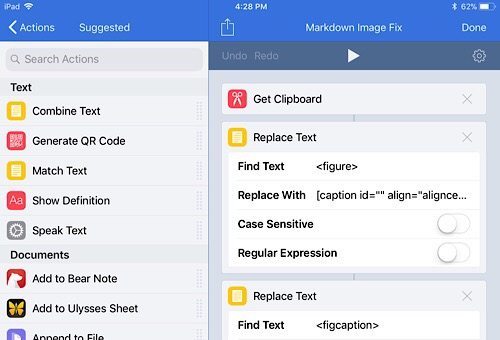
Be sure you have the Workflow app installed and click on the link below to preview the Byword Image Fix Workflow. Save the workflow to your device. This workflow obtains the clipboard, changes the format of the images from the figure/figcaption format to the less restrictive caption format, fills both the caption and alt fields and provides a preview before saving the code back to the clipboard. If you want to know more, read my previous post listed below. As a note, the workflow defaults to 500×375 which works for me because I publish mostly photos shot in 3/4 format. If you have a different standard photo/figure size, feel free to to modify the workflow.
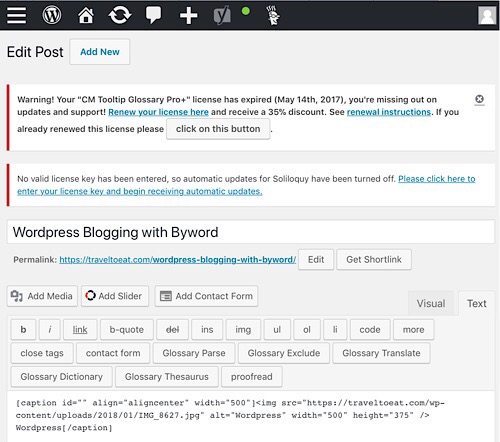
Now go to the WordPress app and click on “WP Admin”, found in the lower left hand corner. When the WordPress Dashboard appears in Safari, click on the three horizontal lines in the upper left hand corner. Go down to posts and click on all posts. Find the post you published in Byword and click on edit. Select the option to edit text, select all the text and paste, which will copy the clipboard to the post. Position the cursor below the first paragraph and add the “more” command, since Byword does not give you this option. If you wish to link the display images to their larger uploaded originals, switch to Visual mode, click on each image in succession, choosing edit/link to/image url. This linking would be unnecessary with the “h ref=“ added to the Workflow code but it requires a loop that my inexperience in programming Workflow could not be added at present, I may add it in the future. Go down the page, click update post and you are done.
I realize that these instructions are given in excruciating detail, but when I began the process of finding a replacement from Blogsy, there was a steep learning curve. The internet gave me posts which promised solutions but few details. It is my hope that this post delivers the detail that has been promised. If you have questions or comments, please post them below.